Connecting to UDOO Neo serial console
Introduction
This post explains how to connect to the Cortex-A9 debug serial of your UDOO Neo to control the U-Boot bootloader, watch your Linux kernel boot, and eventually get a login.
Reference
- See http://www.udoo.org/docs-neo/Hardware_&_Accessories/Uart_serial.html
- UDOO_NEO_schematics.pdf - UDOO Neo Rev.D2 (JUL-2015) Schematics
Required material
- One UDOO Neo Full
- One 8GB microSD Card formatted with a bootable image for your UDOO Neo
- Example: UDOOBuntu_neo_v2.0beta3
- One USB-to-TTL Serial Cable (3.3V level)
- One 10-mil male-to-male pin header strip
- One laptop with a terminal emulator installed
- Example: PuTTY on MS Windows
- A 5Vdc power supply for your UDOO Neo
- Tested withh a USB battery pack plus a USB to Micro-USB cable
UDOO Neo - Cortex A9 Serial Debug Configuration
- Connect to UART_1 (Cortex A9 serial debug)
- Serial Port Parameters: 115200,8,n,1
Wiring Diagram
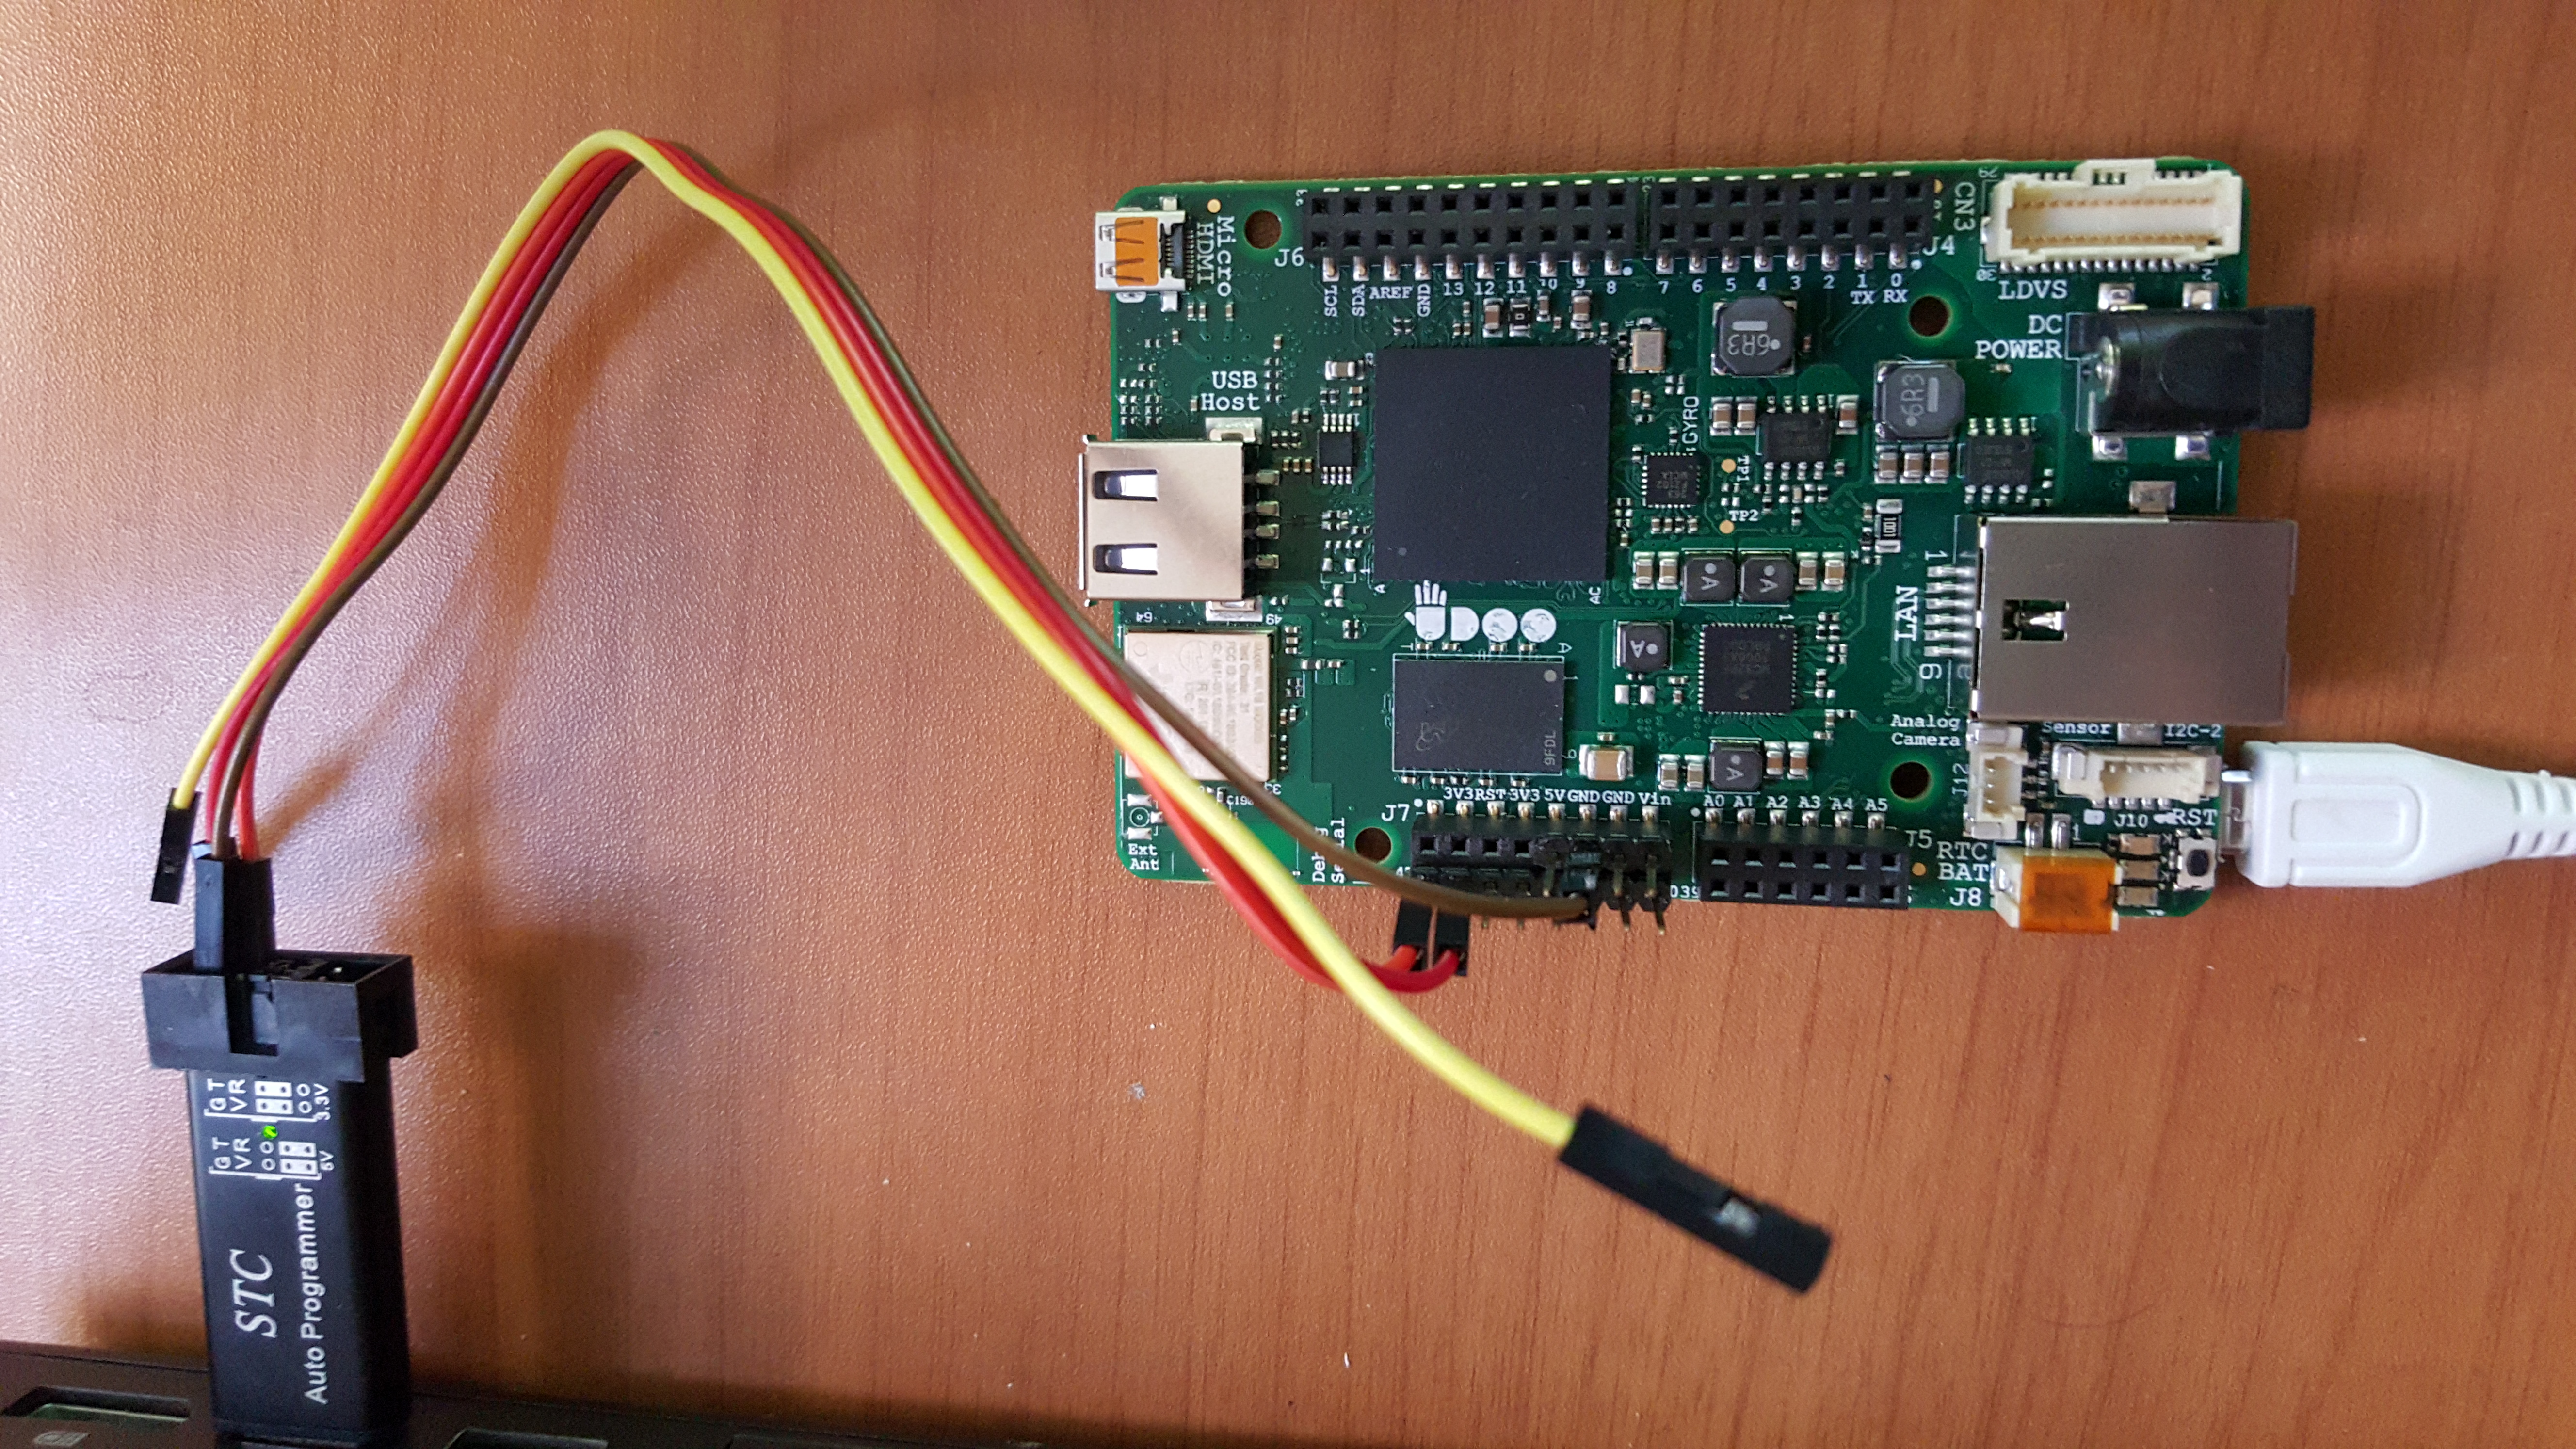
Connect the TTL-level pins of the USB-to-TTL serial cable to your UDOO Neo as follows:
| Dongle Pin | UDOO Neo Pin | Signal |
|---|---|---|
| GND | GND | GND |
| TX | 47 | UART1_RXD |
| RX | 46 | UART1_TXD |
Detail on UART_1 connections
Trying UDOOBuntu_neo_v2.0beta3 - Step-by-step instructions
- Format a 8GB MicroSD Card with Udoobuntu2_beta3
- Follow the instructions at http://www.udoo.org/get-started-neo/
- Plug the MicroSD Card into the MicroSD slot of your UDOO Neo
- Connect the USB plug of the USB-to-TTL dongle on your laptop
- Identify the serial port that is exposed by the USB-to-TTL dongle on your laptop
- I.e. on MS Windows: Start > Computer > Properties > Device Manager then look under "Ports (COM & LPT)"
- Start the terminal emulator on your laptop (parameters: COMxx:115200,8,n,1)
- For convenience you may create a logfile of the data exchanged on the serial console
- Power-up the board by plugging the Micro-USB cable of the battery pack into the Micro-USB connector of your UDOO Neo
- Watch the U-Boot and kernel boot messages on the serial console
Sample logfile: 20151107-1106-udoobuntu2_beta3-udooneo.txt