Deploying WordPress and MySQL with Persistent Volumes on GKE
This article explains how to set up a single-replica WordPress deployment and a single-replica MySQL database on your Kubernetes cluster on the Google Cloud Platform.
Both applications use PersistentVolumes (PV) and PersistentVolumeClaims (PVC) to store data.
NOTE: This deployment is not meant for production use cases as it uses single instance WordPress and MySQL Pods. I will discuss how to deploy a redundant configuration of web front-end and database in a future post.
References
The instructions documented in this article were based on the following resources:
- https://kubernetes.io/docs/tutorials/stateful-application/mysql-wordpress-persistent-volume/
- https://cloud.google.com/kubernetes-engine/docs/tutorials/persistent-disk
- https://github.com/GoogleCloudPlatform/kubernetes-engine-samples
Prerequisites
Access to a Kubernetes cluster already created on the Google Cloud Platform
Step 1: Preparation
Check prerequisites
Let us assume we have already created a GKE cluster and started a Cloud Shell
gcloud config set project kubernetes-workshop-218213
gcloud container clusters get-credentials howlernoon --zone=europe-west1-b
kubectl config use-context gke_kubernetes-workshop-218213_europe-west1-b_howlernoon
kubectl get nodes
Result
gmacario@cloudshell:~ (kubernetes-workshop-218213)$ kubectl get nodes
NAME                                        STATUS    ROLES     AGE       VERSION
gke-howlernoon-default-pool-844aa4f7-5n4j   Ready     <none>    1d        v1.9.7-gke.6
gke-howlernoon-default-pool-844aa4f7-8zxl   Ready     <none>    1d        v1.9.7-gke.6
gke-howlernoon-default-pool-844aa4f7-mrv2   Ready     <none>    1d        v1.9.7-gke.6
gmacario@cloudshell:~ (kubernetes-workshop-218213)$
Clone kubernetes-engine-samples repository
Logged as gmacario@cloudshell, clone the GKE samples repository:
mkdir -p ~/github/GoogleCloudPlatform
cd ~/github/GoogleCloudPlatform
git clone https://github.com/GoogleCloudPlatform/kubernetes-engine-samples
cd kubernetes-engine-samples/wordpress-persistent-disks
ls -la
Result:
gmacario@cloudshell:~/github/GoogleCloudPlatform/kubernetes-engine-samples/wordpress-persistent-disks (kubernetes-workshop-218213)$ ls -la
total 36
drwxr-xr-x  2 gmacario gmacario 4096 Oct 16 15:28 .
drwxr-xr-x 13 gmacario gmacario 4096 Oct 16 15:28 ..
-rw-r--r--  1 gmacario gmacario  155 Oct 16 15:28 mysql-service.yaml
-rw-r--r--  1 gmacario gmacario  168 Oct 16 15:28 mysql-volumeclaim.yaml
-rw-r--r--  1 gmacario gmacario  787 Oct 16 15:28 mysql.yaml
-rw-r--r--  1 gmacario gmacario  152 Oct 16 15:28 README.md
-rw-r--r--  1 gmacario gmacario  209 Oct 16 15:28 wordpress-service.yaml
-rw-r--r--  1 gmacario gmacario  172 Oct 16 15:28 wordpress-volumeclaim.yaml
-rw-r--r--  1 gmacario gmacario  878 Oct 16 15:28 wordpress.yaml
gmacario@cloudshell:~/github/GoogleCloudPlatform/kubernetes-engine-samples/wordpress-persistent-disks (kubernetes-workshop-218213)$
Step 2: Create PersistentVolumeClaims and PersistentVolumes
Logged as gmacario@cloudshell, create the PersistentVolumeClaims required for the deployments:
kubectl apply -f mysql-volumeclaim.yaml
kubectl apply -f wordpress-volumeclaim.yaml
Contents of mysql-volumeclaim.yaml
kind: PersistentVolumeClaim
apiVersion: v1
metadata:
  name: mysql-volumeclaim
spec:
  accessModes:
    - ReadWriteOnce
  resources:
    requests:
      storage: 200Gi
Contents of wordpress-volumeclaim.yaml
kind: PersistentVolumeClaim
apiVersion: v1
metadata:
  name: wordpress-volumeclaim
spec:
  accessModes:
    - ReadWriteOnce
  resources:
    requests:
      storage: 200Gi
Result:
gmacario@cloudshell:~/github/GoogleCloudPlatform/kubernetes-engine-samples/wordpress-persistent-disks (kubernetes-workshop-218213)$ kubectl apply -f mysql-volumeclaim.yaml
persistentvolumeclaim "mysql-volumeclaim" created
gmacario@cloudshell:~/github/GoogleCloudPlatform/kubernetes-engine-samples/wordpress-persistent-disks (kubernetes-workshop-218213)$ kubectl apply -f wordpress-volumeclaim.yaml
persistentvolumeclaim "wordpress-volumeclaim" created
gmacario@cloudshell:~/github/GoogleCloudPlatform/kubernetes-engine-samples/wordpress-persistent-disks (kubernetes-workshop-218213)$
Check if the claims get bound:
kubectl get persistentvolumeclaims
Result:
gmacario@cloudshell:~/github/GoogleCloudPlatform/kubernetes-engine-samples/wordpress-persistent-disks (kubernetes-workshop-218213)$ kubectl get persistentvolumeclaims
NAME                    STATUS    VOLUME                                     CAPACITY   ACCESS MODES   STORAGECLASS   AGE
mysql-volumeclaim       Bound     pvc-b4cd3770-d147-11e8-8172-42010a8401ee   200Gi      RWO            standard       1m
wordpress-volumeclaim   Bound     pvc-be4103f6-d147-11e8-8172-42010a8401ee   200Gi      RWO            standard       1m
gmacario@cloudshell:~/github/GoogleCloudPlatform/kubernetes-engine-samples/wordpress-persistent-disks (kubernetes-workshop-218213)$
Step 3: Set up MySQL
Create a Secret for MySQL Password
Logged as gmacario@cloudshell, run the following command (and replace YOUR_PASSWORD with a passphrase of your choice):
kubectl create secret generic mysql --from-literal=password=YOUR_PASSWORD
Result:
gmacario@cloudshell:~ (kubernetes-workshop-218213)$ kubectl create secret generic mysql --from-literal=password=xxxx
secret "mysql" created
gmacario@cloudshell:~ (kubernetes-workshop-218213)$
Deploy MySQL
Logged as gmacario@cloudshell, use the mysql.yaml manifest file to deploy the single instance MySQL application running on port 3306:
kubectl create -f mysql.yaml
Contents of mysql.yaml
apiVersion: extensions/v1beta1
kind: Deployment
metadata:
  name: mysql
  labels:
    app: mysql
spec:
  replicas: 1
  selector:
    matchLabels:
      app: mysql
  template:
    metadata:
      labels:
        app: mysql
    spec:
      containers:
        - image: mysql:5.6
          name: mysql
          env:
            - name: MYSQL_ROOT_PASSWORD
              valueFrom:
                secretKeyRef:
                  name: mysql
                  key: password
          ports:
            - containerPort: 3306
              name: mysql
          volumeMounts:
            - name: mysql-persistent-storage
              mountPath: /var/lib/mysql
      volumes:
        - name: mysql-persistent-storage
          persistentVolumeClaim:
            claimName: mysql-volumeclaim
Result:
gmacario@cloudshell:~/github/GoogleCloudPlatform/kubernetes-engine-samples/wordpress-persistent-disks (kubernetes-workshop-218213)$ kubectl create -f mysql.yaml
deployment.extensions "mysql" created
gmacario@cloudshell:~/github/GoogleCloudPlatform/kubernetes-engine-samples/wordpress-persistent-disks (kubernetes-workshop-218213)$
Check that the pod is running with kubectl get pods -l app=mysql (it might take a few minutes):
gmacario@cloudshell:~/github/GoogleCloudPlatform/kubernetes-engine-samples/wordpress-persistent-disks (kubernetes-workshop-218213)$ kubectl get pods -l app=mysql
NAME                    READY     STATUS    RESTARTS   AGE
mysql-d55697945-h7thb   1/1       Running   0          1m
gmacario@cloudshell:~/github/GoogleCloudPlatform/kubernetes-engine-samples/wordpress-persistent-disks (kubernetes-workshop-218213)$
Create MySQL service
Logged as gmacario@cloudshell, create a Service to expose the MySQL container and make it accessible from the wordpress container you are going to create.
kubectl create -f mysql-service.yaml
Contents of mysql-service.yaml
apiVersion: v1
kind: Service
metadata:
  name: mysql
  labels:
    app: mysql
spec:
  type: ClusterIP
  ports:
    - port: 3306
  selector:
    app: mysql
Result:
gmacario@cloudshell:~/github/GoogleCloudPlatform/kubernetes-engine-samples/wordpress-persistent-disks (kubernetes-workshop-218213)$ kubectl create -f mysql-service.yaml
service "mysql" created
gmacario@cloudshell:~/github/GoogleCloudPlatform/kubernetes-engine-samples/wordpress-persistent-disks (kubernetes-workshop-218213)$
Check to see if the Service is created
kubectl get service mysql
Result:
gmacario@cloudshell:~/github/GoogleCloudPlatform/kubernetes-engine-samples/wordpress-persistent-disks (kubernetes-workshop-218213)$ kubectl get service mysql
NAME      TYPE        CLUSTER-IP     EXTERNAL-IP   PORT(S)    AGE
mysql     ClusterIP   10.35.247.32   <none>        3306/TCP   52s
gmacario@cloudshell:~/github/GoogleCloudPlatform/kubernetes-engine-samples/wordpress-persistent-disks (kubernetes-workshop-218213)$
Step 4: Set up WordPress
Deploy WordPress
Logged as gmacario@cloudshell
kubectl create -f wordpress.yaml
Contents of wordpress.yaml
apiVersion: extensions/v1beta1
kind: Deployment
metadata:
  name: wordpress
  labels:
    app: wordpress
spec:
  replicas: 1
  selector:
    matchLabels:
      app: wordpress
  template:
    metadata:
      labels:
        app: wordpress
    spec:
      containers:
        - image: wordpress
          name: wordpress
          env:
          - name: WORDPRESS_DB_HOST
            value: mysql:3306
          - name: WORDPRESS_DB_PASSWORD
            valueFrom:
              secretKeyRef:
                name: mysql
                key: password
          ports:
            - containerPort: 80
              name: wordpress
          volumeMounts:
            - name: wordpress-persistent-storage
              mountPath: /var/www/html
      volumes:
        - name: wordpress-persistent-storage
          persistentVolumeClaim:
            claimName: wordpress-volumeclaim
Result:
gmacario@cloudshell:~/github/GoogleCloudPlatform/kubernetes-engine-samples/wordpress-persistent-disks (kubernetes-workshop-218213)$ kubectl create -f wordpress.yaml
deployment.extensions "wordpress" created
gmacario@cloudshell:~/github/GoogleCloudPlatform/kubernetes-engine-samples/wordpress-persistent-disks (kubernetes-workshop-218213)$
Type kubectl get pod -l app=wordpress to check if the Pod is running
gmacario@cloudshell:~/github/GoogleCloudPlatform/kubernetes-engine-samples/wordpress-persistent-disks (kubernetes-workshop-218213)$ kubectl get pod -l app=wordpress
NAME                         READY     STATUS    RESTARTS   AGE
wordpress-7dd5cbc5d5-tr9ht   1/1       Running   0          1m
gmacario@cloudshell:~/github/GoogleCloudPlatform/kubernetes-engine-samples/wordpress-persistent-disks (kubernetes-workshop-218213)$
Expose WordPress service
Logged as gmacario@cloudshell
kubectl create -f wordpress-service.yaml
Contents of wordpress-service.yaml
apiVersion: v1
kind: Service
metadata:
  labels:
    app: wordpress
  name: wordpress
spec:
  type: LoadBalancer
  ports:
    - port: 80
      targetPort: 80
      protocol: TCP
  selector:
    app: wordpress
Result:
gmacario@cloudshell:~/github/GoogleCloudPlatform/kubernetes-engine-samples/wordpress-persistent-disks (kubernetes-workshop-218213)$ kubectl create -f wordpress-service.yaml
service "wordpress" created
gmacario@cloudshell:~/github/GoogleCloudPlatform/kubernetes-engine-samples/wordpress-persistent-disks (kubernetes-workshop-218213)$
Type kubectl get svc -l app=wordpress to chceck if the service is running
gmacario@cloudshell:~/github/GoogleCloudPlatform/kubernetes-engine-samples/wordpress-persistent-disks (kubernetes-workshop-218213)$ kubectl get svc -l app=wordpress
NAME        TYPE           CLUSTER-IP      EXTERNAL-IP     PORT(S)        AGE
wordpress   LoadBalancer   10.35.240.204   35.205.34.119   80:32426/TCP   54s
gmacario@cloudshell:~/github/GoogleCloudPlatform/kubernetes-engine-samples/wordpress-persistent-disks (kubernetes-workshop-218213)$
So the wordpress service will be publicly available as http://35.205.34.119:80
Step 5: Visit your new WordPress blog
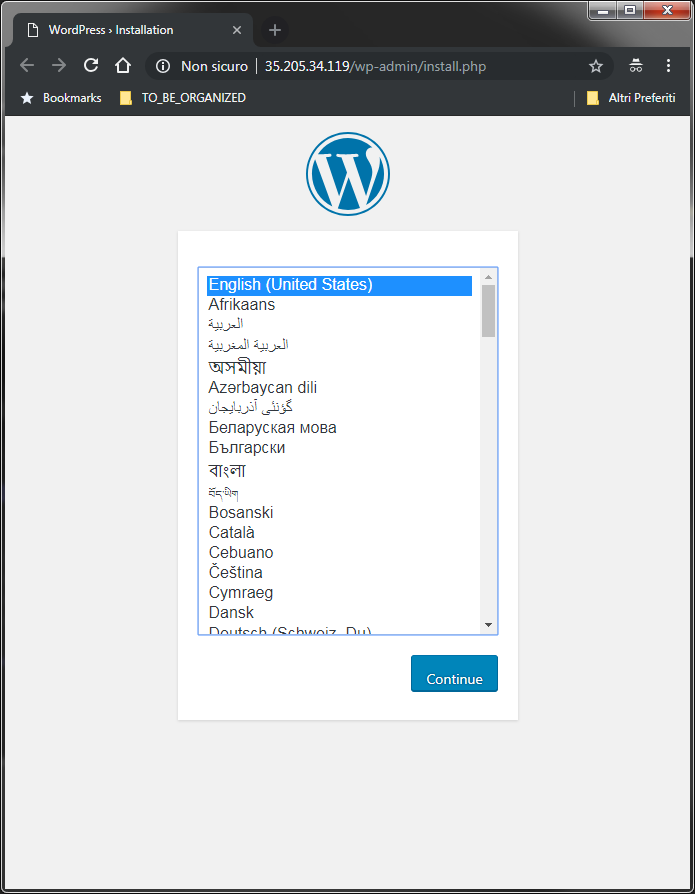
After finding out the IP address of your blog, point your browser to this IP address and you will see the WordPress installation screen as follows:

Select "English (United States)", then click "Continue".

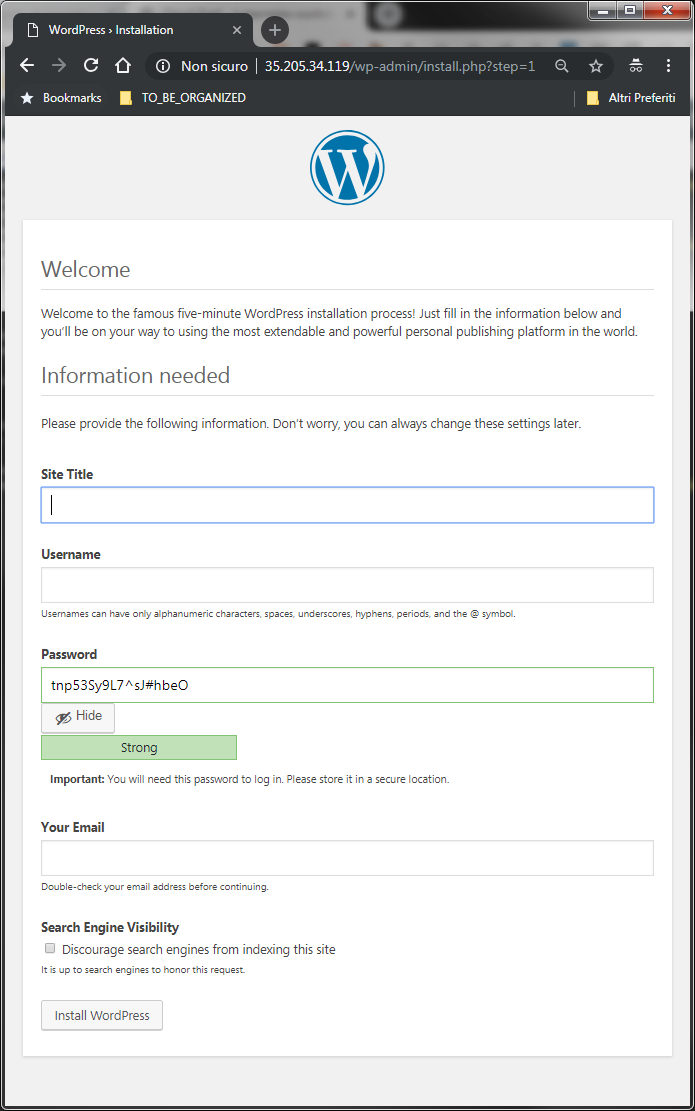
Fill in the needed information:
- Site Title: TODO (example: "My Wonderful WordPress site")
- Username: TODO (example: "admin")
- Password: TODO (example: "mypass")
- Your Email: TODO (example: "myuser@example.com")
- In section "Search Engine Visibility", check "Discourage search engines from indexing this site
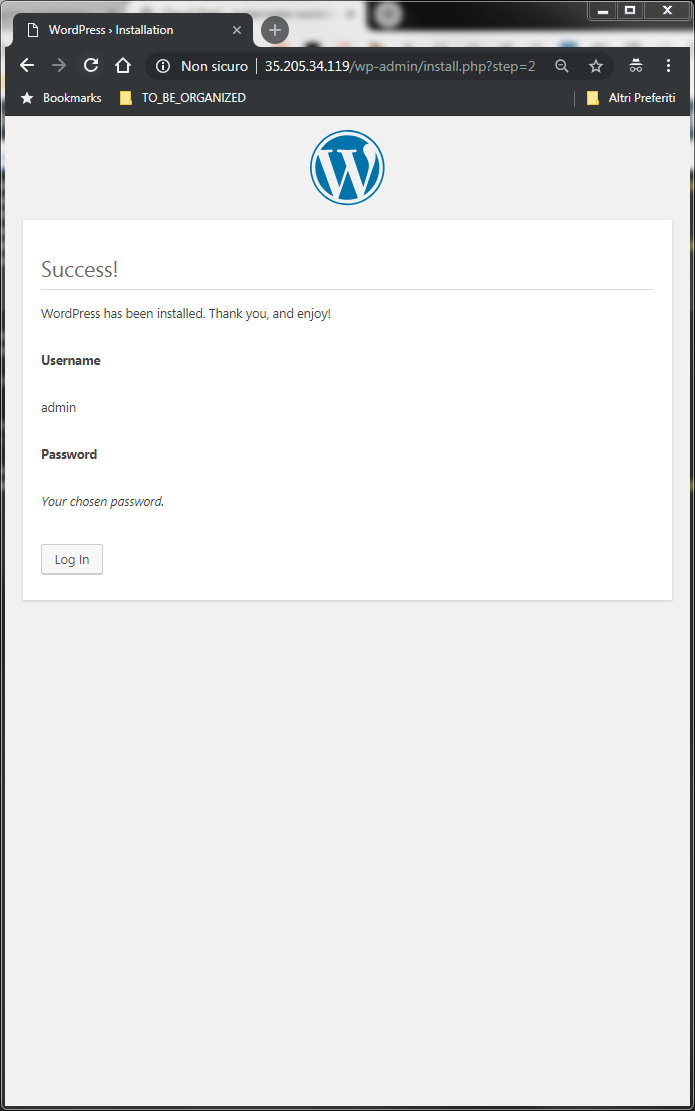
then click "Install WordPress"

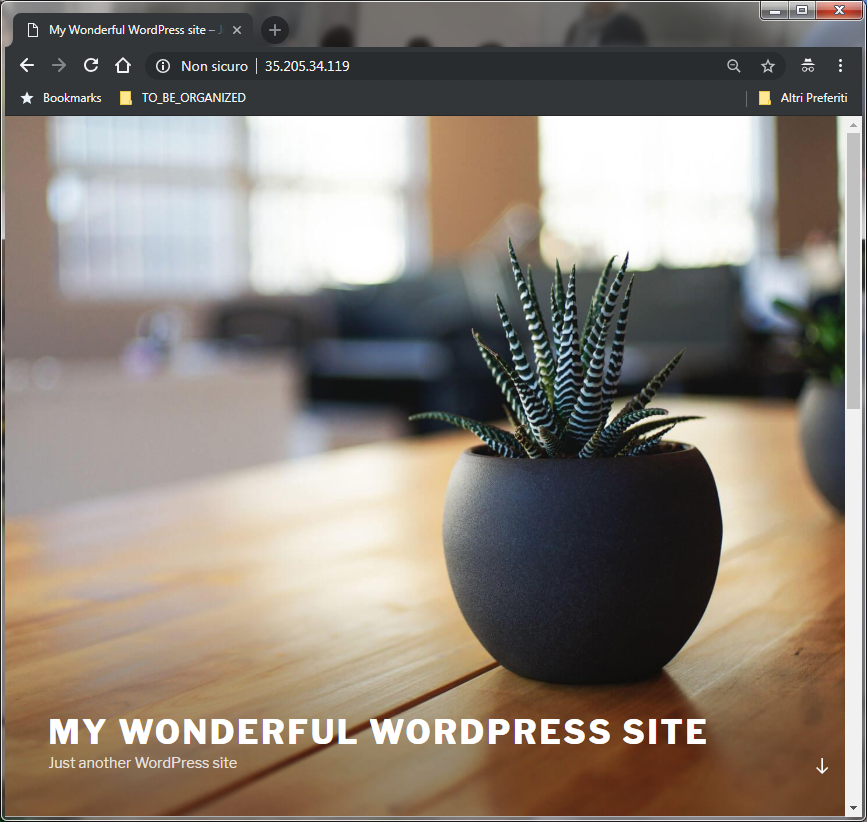
After the initial configuration of WordPress is complete, the following page will be displayed when browsing http://35.205.34.119/:

Step 6 (Optional) Test data persistence on failure
With PersistentVolumes, your data lives outside the application container.r When your container becomes unavailable and gets rescheduled onto another compute instance by Kubernetes, GKE will make the PersistentVolume available on the instance that started running the Pod.
Logged as gmacario@cloudshell, watch the running pods
kubectl get pods -o wide -w
Result:
gmacario@cloudshell:~ (kubernetes-workshop-218213)$ kubectl get pods -o wide -w
NAME                         READY     STATUS    RESTARTS   AGE       IP           NODE
mysql-d55697945-h7thb        1/1       Running   0          18h       10.32.2.15   gke-howlernoon-default-pool-844aa4f7-5n4j
wordpress-7dd5cbc5d5-tr9ht   1/1       Running   0          18h       10.32.2.16   gke-howlernoon-default-pool-844aa4f7-5n4j
If from another terminal we now delete the mysql pod:
kubectl delete pod -l app=mysql
We should observe that the Deployment controller will create the pod again.
gmacario@cloudshell:~ (kubernetes-workshop-218213)$ kubectl get pods -o wide
NAME                         READY     STATUS    RESTARTS   AGE       IP           NODE
mysql-d55697945-f5lss        1/1       Running   0          58m       10.32.2.17   gke-howlernoon-default-pool-844aa4f7-5n4j
wordpress-7dd5cbc5d5-tr9ht   1/1       Running   0          19h       10.32.2.16   gke-howlernoon-default-pool-844aa4f7-5n4j
gmacario@cloudshell:~ (kubernetes-workshop-218213)$
Step 7: Updating application images
The following commands will update the WordPress container image:
cd ~/github/GoogleCloudPlatform/kubernetes-engine-samples
cd wordpress-persistent-disks
vi wordpress.yaml # Update the image: value
kubectl apply -f wordpress.yaml
The Deployment controller will cause a new Pod to be created, while the old one will be terminated.
Cleaning up
Logged as gmacario@cloudshell, delete the wordpress and mysql services:
kubectl delete service wordpress
kubectl delete service mysql
Wait for the Load Balancer provisioned for the wordpress service to be deleted:
gcloud compute forwarding-rules list
Delete the deployments for MySQL and WordPress:
kubectl delete deployment wordpress
kubectl delete deployment mysql
Delete the PersistentVolumeClaims for MySQL and WordPress:
kubectl delete pvc wordpress-volumeclaim
kubectl delete pvc mysql-volumeclaim
In case you do not need the container cluster any longer, type the following command to delete it:
gcloud container clusters delete xxx
Summary
This article explained how to deploy WordPress with a MySQL backend on a Kubernetes cluster on GCP.