NeoPixel LED Strips for Expo Mattoncino 3
This post explains how we created the light effects at Expo Mattoncino 3 which took place in Pinerolo (TO) on 20 and 21-MAY-2017.
Preparing the light effect using a NeoPix LED strip
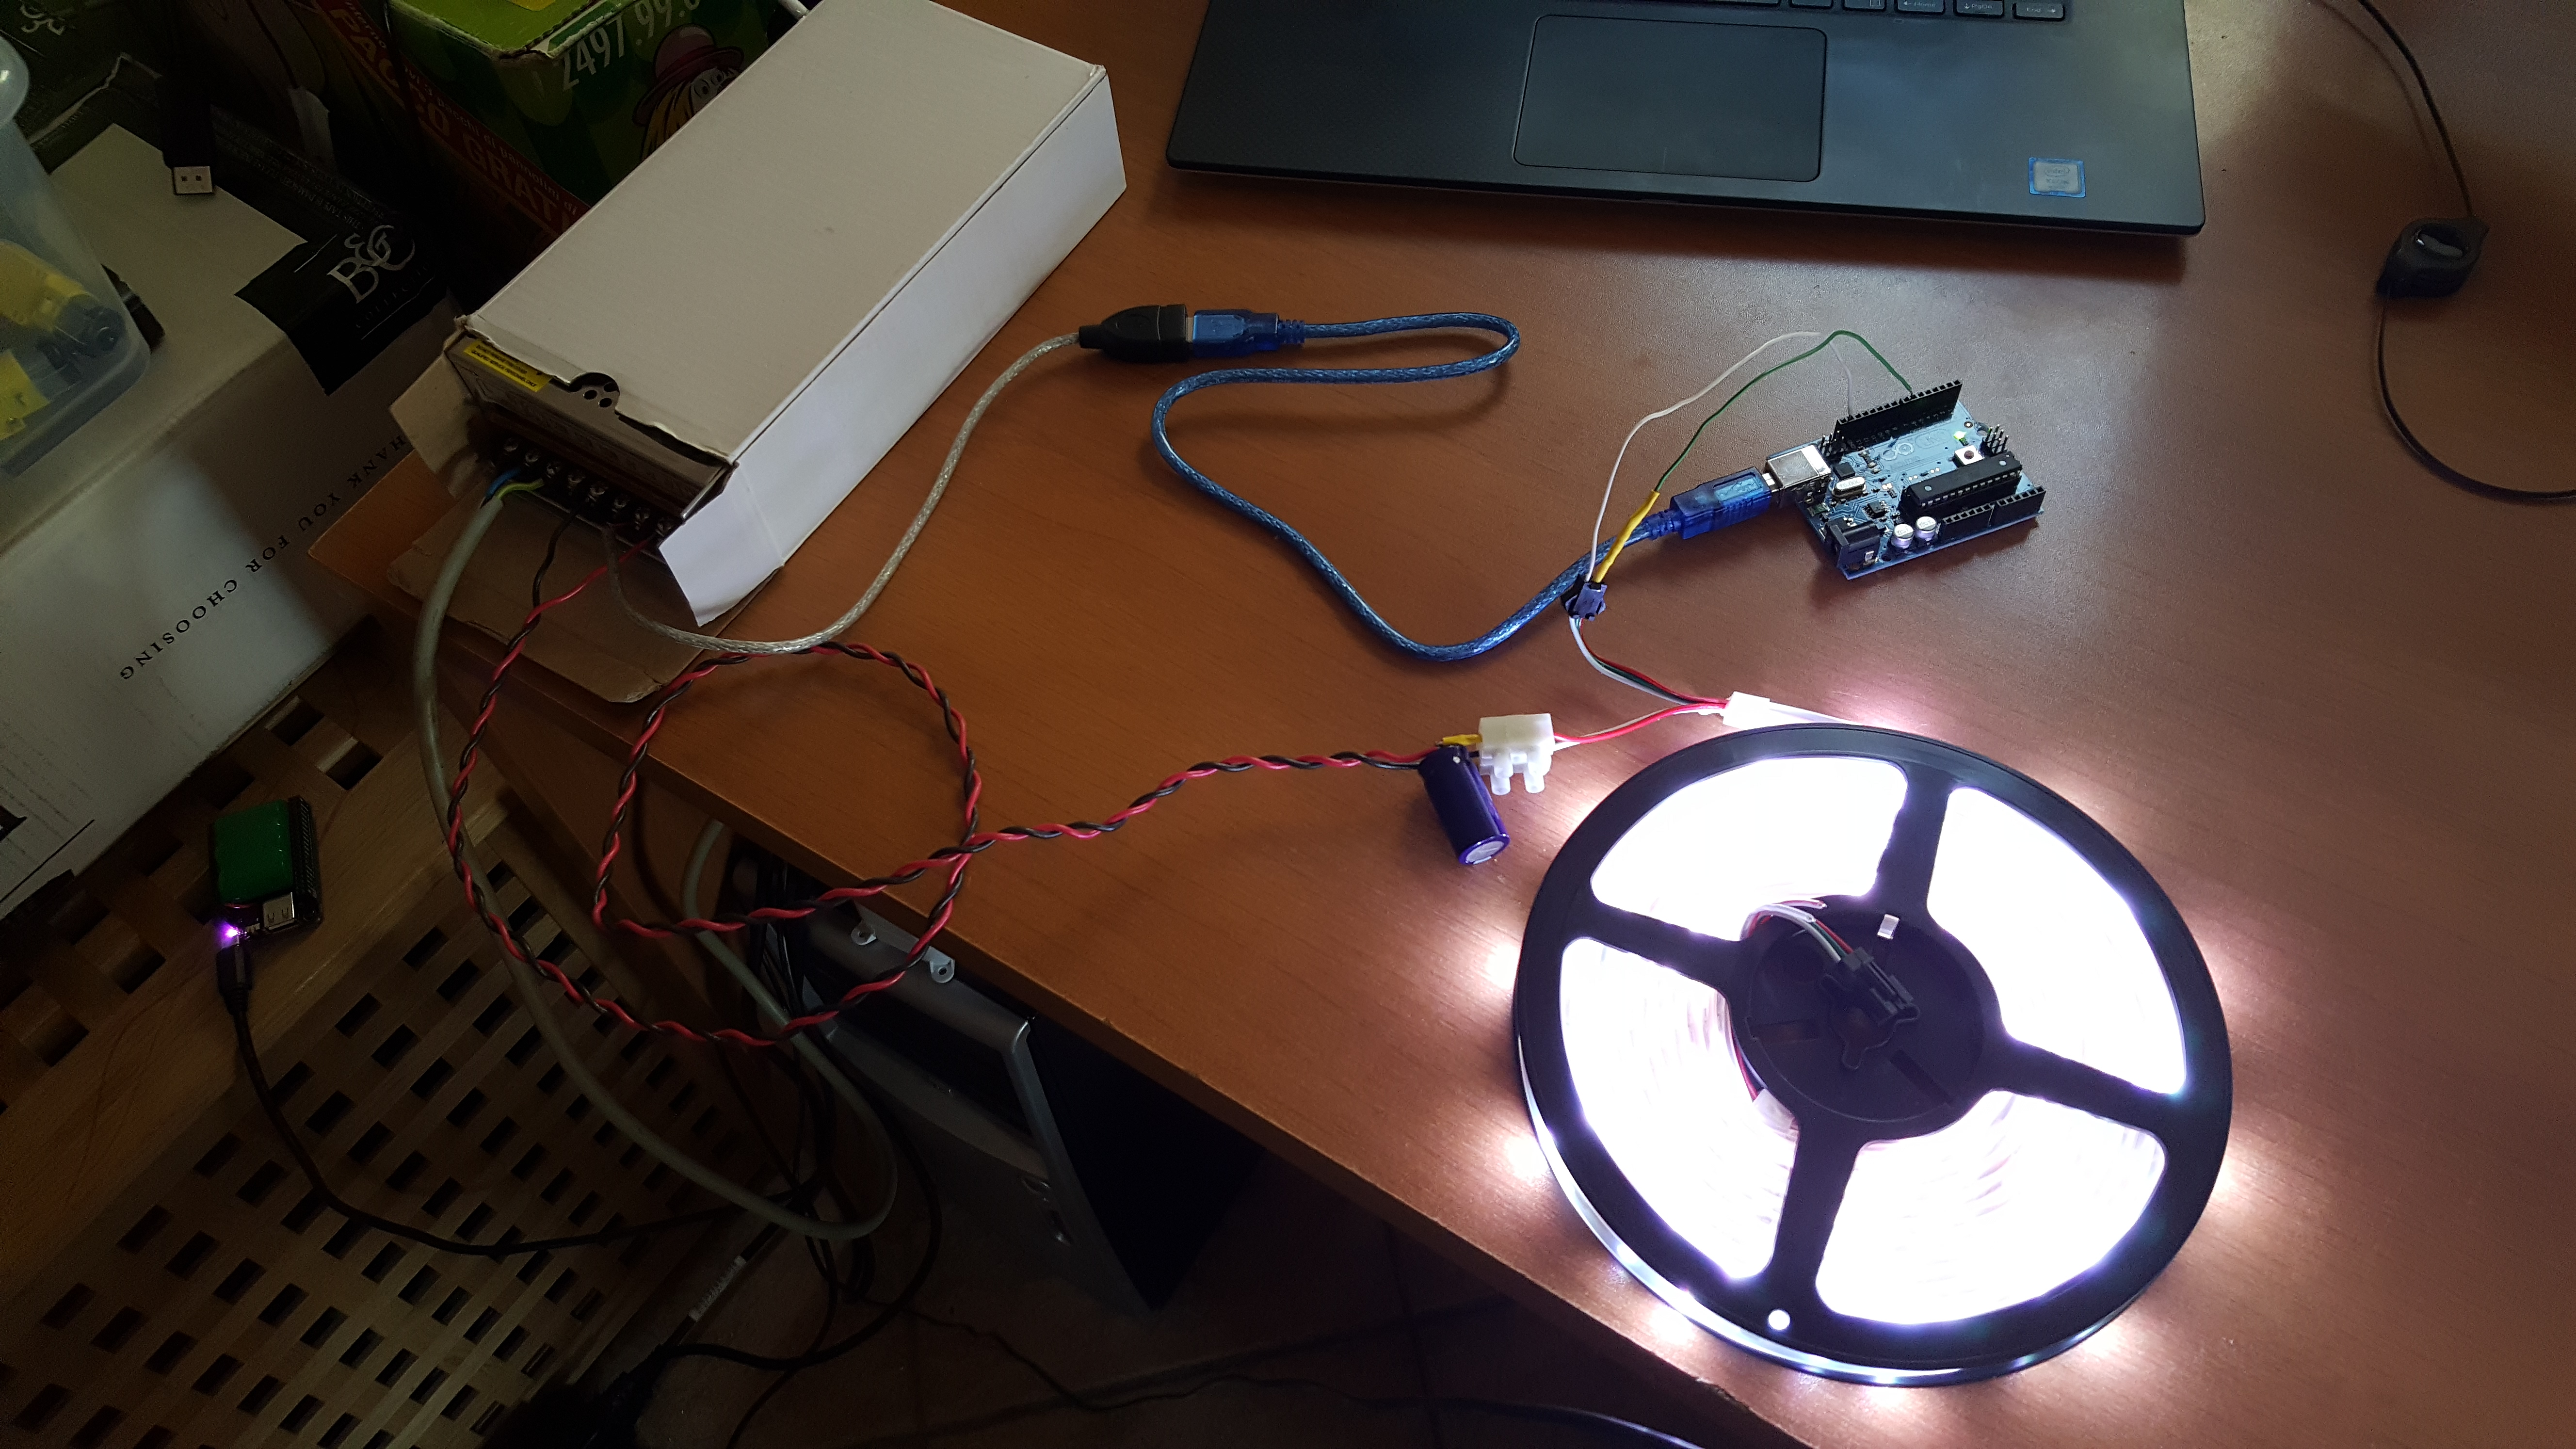
In order to create the light effect we used an Arduino UNO programmed with a sketch to control a 5m NeoPixel LED strip.
Required materials
| Qty | Description | Price [EUR] | Notes |
|---|---|---|---|
| 1 | Arduino UNO | ? | - |
| 1 | DC5v 5m 60 LED/m ws2812b WS2812 LED Strip Smart RGB 5050 Full color Pixel IC Digital individually Addressable IP67 waterproof tape light | 28.80 | - |
| 1 | Driver for Power LED AC110V-240V to DC 5V 40A strip Power Supply Adapter Transformer Driver for LED Strip light /CCTV | 25.21 | - |
| 1 | Power cable 220Vac Italian plug | ? | - |
| 1 | Cable USB-A female | ? | - |
| 1 | Electrolytic Capacitor 1000 uF 16V | ? | - |
| 1 | Resistor 470 Ohm 0.25 W | ? | - |
Assemble Hardware
- Connect the Red wire of the LED strip to a +5Vdc screw of the Power Supply
- Connect White wire of the LED strip to a GND screw of the Power Supply
- Connect the white wire of the female connector of the LED strip to the Arduino GND pin
- Connect the green wire of the female connector of the LED strip to the Arduino Pin6 through a 470 Ohm resistor
- Place the Electrolytic Capacitor near the Red and White wires of the LED strip
- Connect the main power cable to the input of the Power Supply
- Plug the main power cable. All the LEDs in the strip should turn white after few seconds.
Configure project strandtest
Checkout https://github.com/adafruit/Adafruit_NeoPixel
git clone https://github.com/adafruit/Adafruit_NeoPixel
cd Adafruit_NeoPixel/examples/strandtest
Now edit file strandtest.ino and make the following changes
gmacario@ITM-GPAOLO-W10:~/Adafruit_NeoPixel/examples/strandtest (master)*$ git diff
diff --git a/examples/strandtest/strandtest.ino b/examples/strandtest/strandtest.ino
index 350b0a5..1a46fc3 100644
--- a/examples/strandtest/strandtest.ino
+++ b/examples/strandtest/strandtest.ino
@@ -13,7 +13,7 @@
 //   NEO_GRB     Pixels are wired for GRB bitstream (most NeoPixel products)
 //   NEO_RGB     Pixels are wired for RGB bitstream (v1 FLORA pixels, not v2)
 //   NEO_RGBW    Pixels are wired for RGBW bitstream (NeoPixel RGBW products)
-Adafruit_NeoPixel strip = Adafruit_NeoPixel(60, PIN, NEO_GRB + NEO_KHZ800);
+Adafruit_NeoPixel strip = Adafruit_NeoPixel(300, PIN, NEO_GRB + NEO_KHZ800);

 // IMPORTANT: To reduce NeoPixel burnout risk, add 1000 uF capacitor across
 // pixel power leads, add 300 - 500 Ohm resistor on first pixel's data input
gmacario@ITM-GPAOLO-W10:~/Adafruit_NeoPixel/examples/strandtest (master)*$
Start Arduino IDE (tested on Arduino 1.8.2)
- Arduino: Tools > Board: "Arduino/Genuino Uno"
- Arduino: Tools > Port > (choose appropriate COM port)
- Arduino: Sketch > Include Library > Manage Libraries
- Install "Adafruit NeoPixel" version 1.1.1
- Arduino: File > Open project
strandtest - Arduino: Sketch > Verify/Compile
- Arduino: Sketch > Upload
Testing the LED Strip
Verify that the LED strips changes colors as instructed in the sketch.
If everything works as expected unplug the USB connector of the Arduino from the PC and connect to the 5Vdc Power Supply.
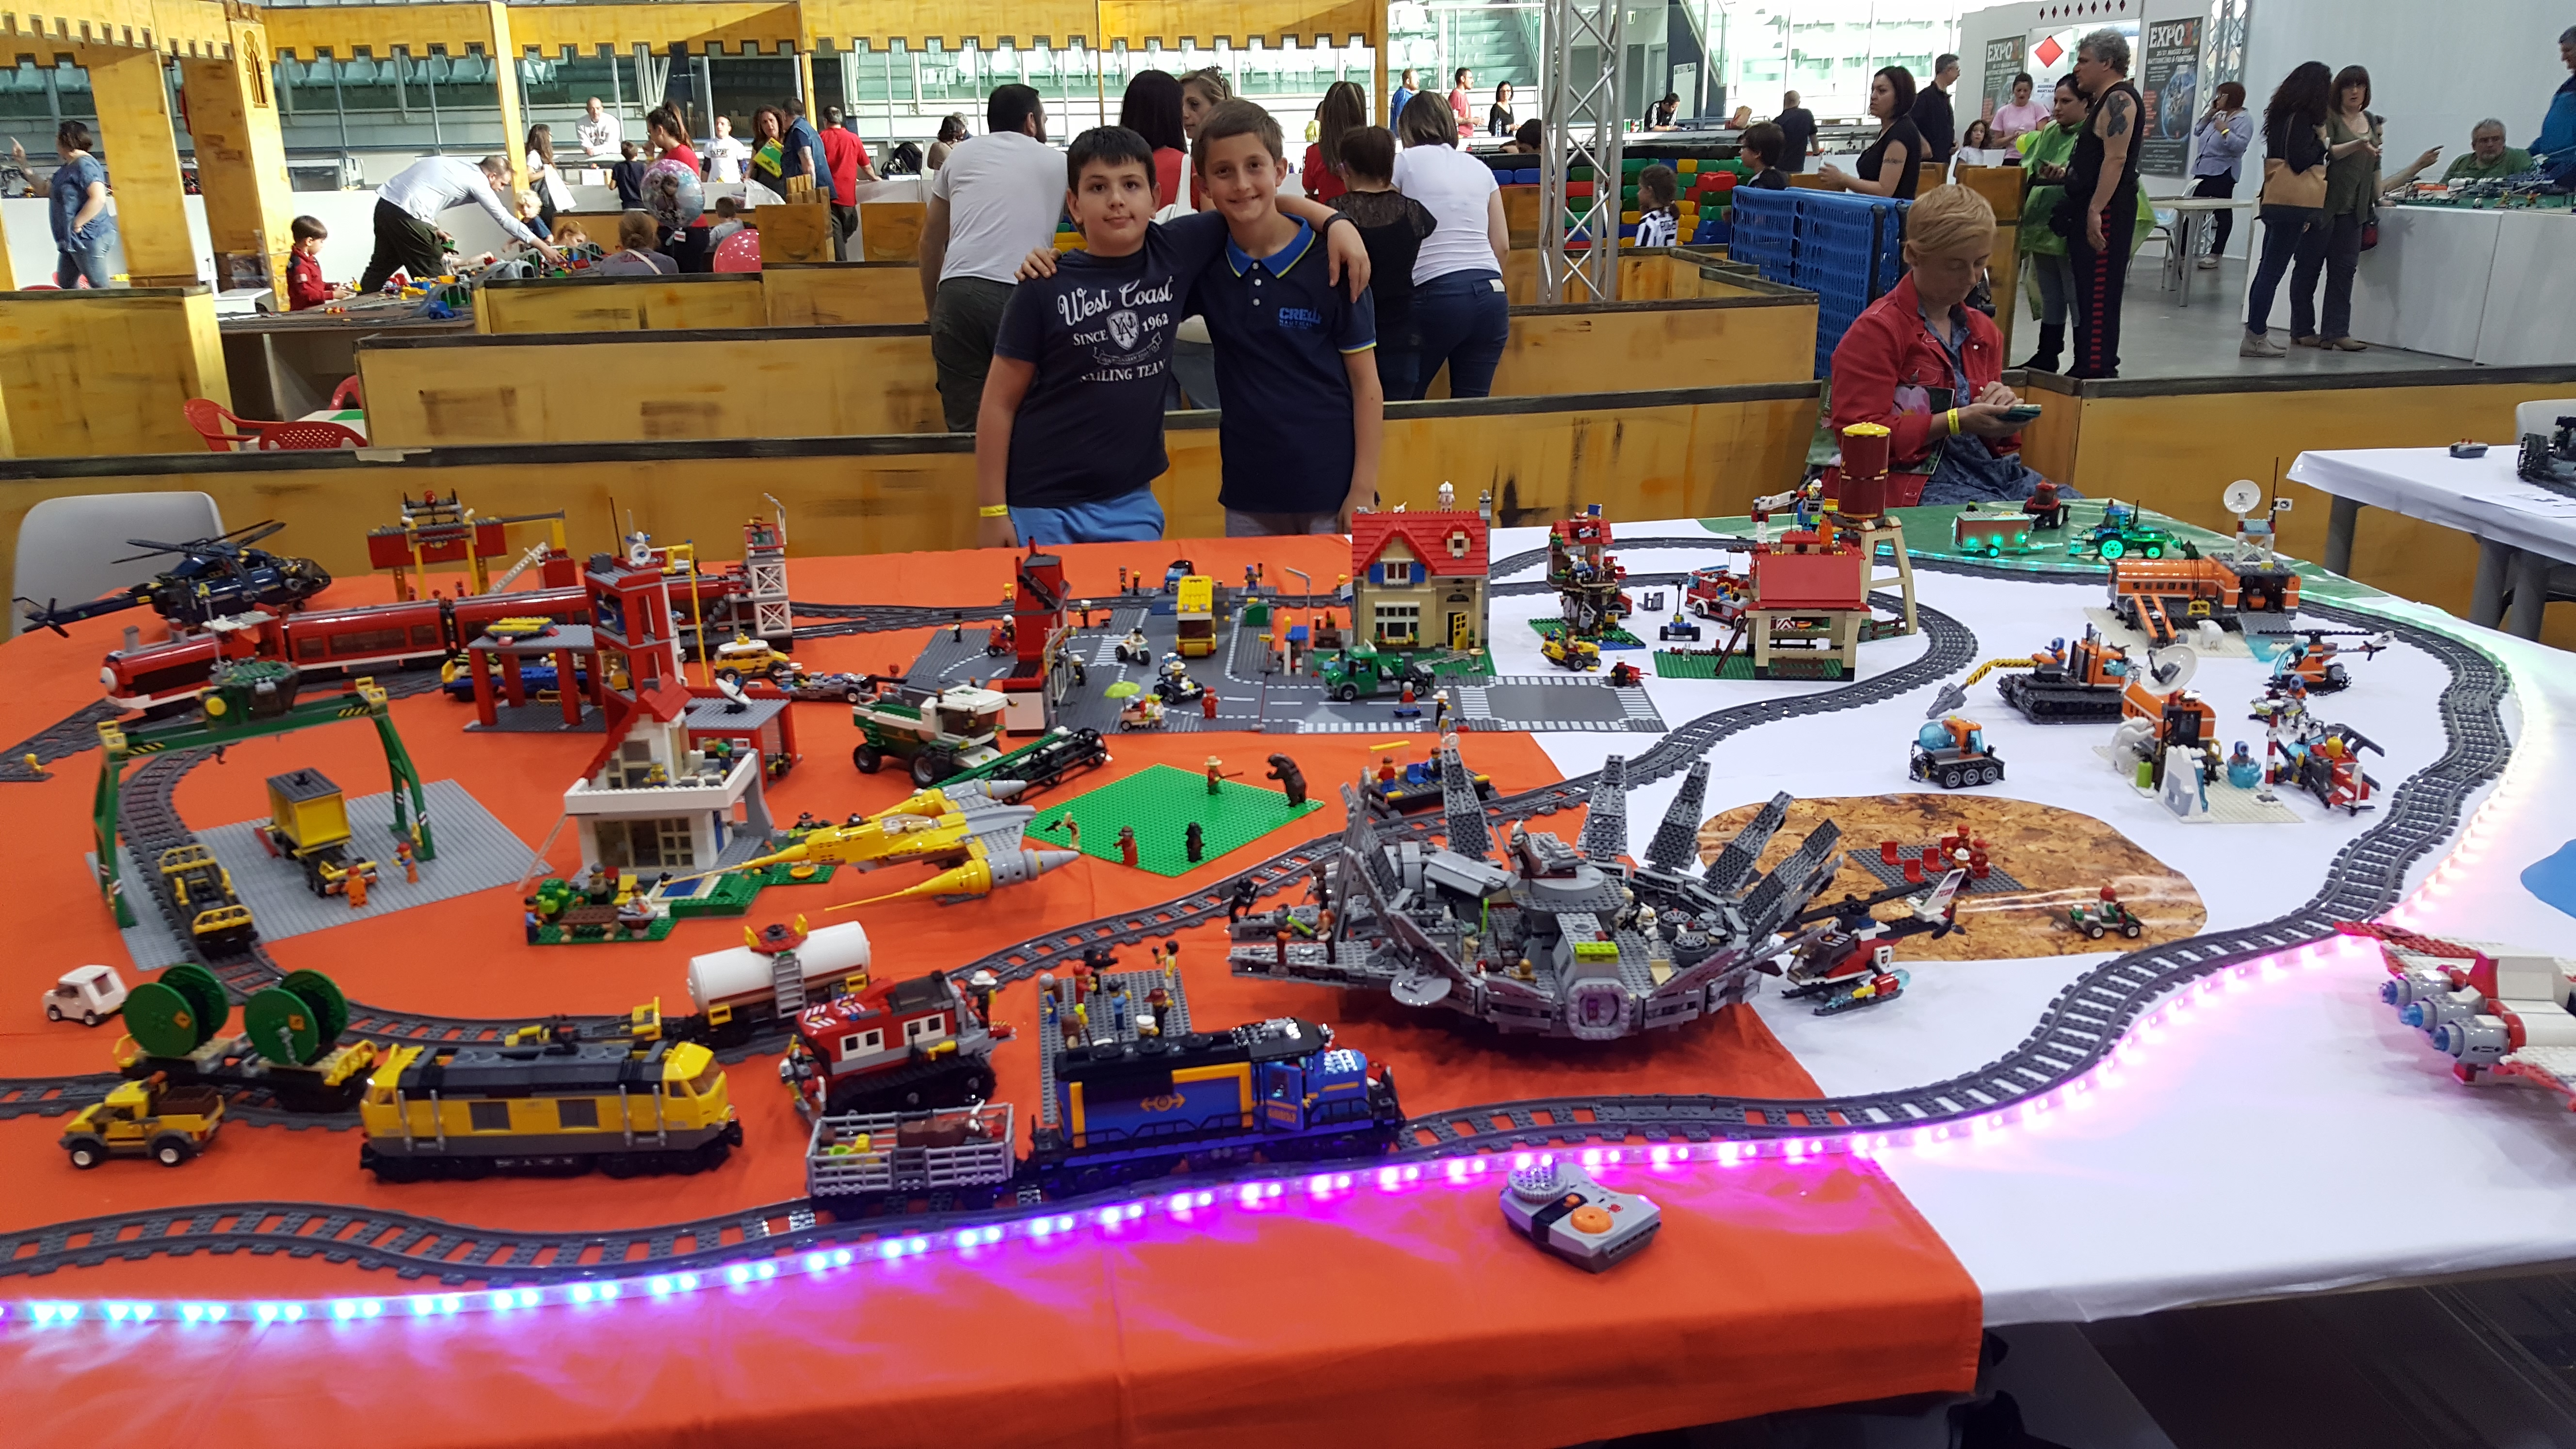
The final result
References
NeoPixel LEDs
- The Magic of NeoPixels - Adafruit NeoPixel Uberguide
- Adafruit NeoPixel Library (GitHub): https://github.com/adafruit/Adafruit_NeoPixel
- NeoPixel LEDs: Arduino Basics - Arduino Project Hub
- Arduino: Come usare LED RGB NeoPixel - Sciammanna Lucio
Misc links
- WS2812 Datasheet (PDF, 5 pages)
- https://github.com/craftcodiness/arduino-lights